Dream, meet realized. For as long as I’ve been decorating my living spaces, I have wanted a card catalog. That desire got stronger when I created my writing-themed office a […]
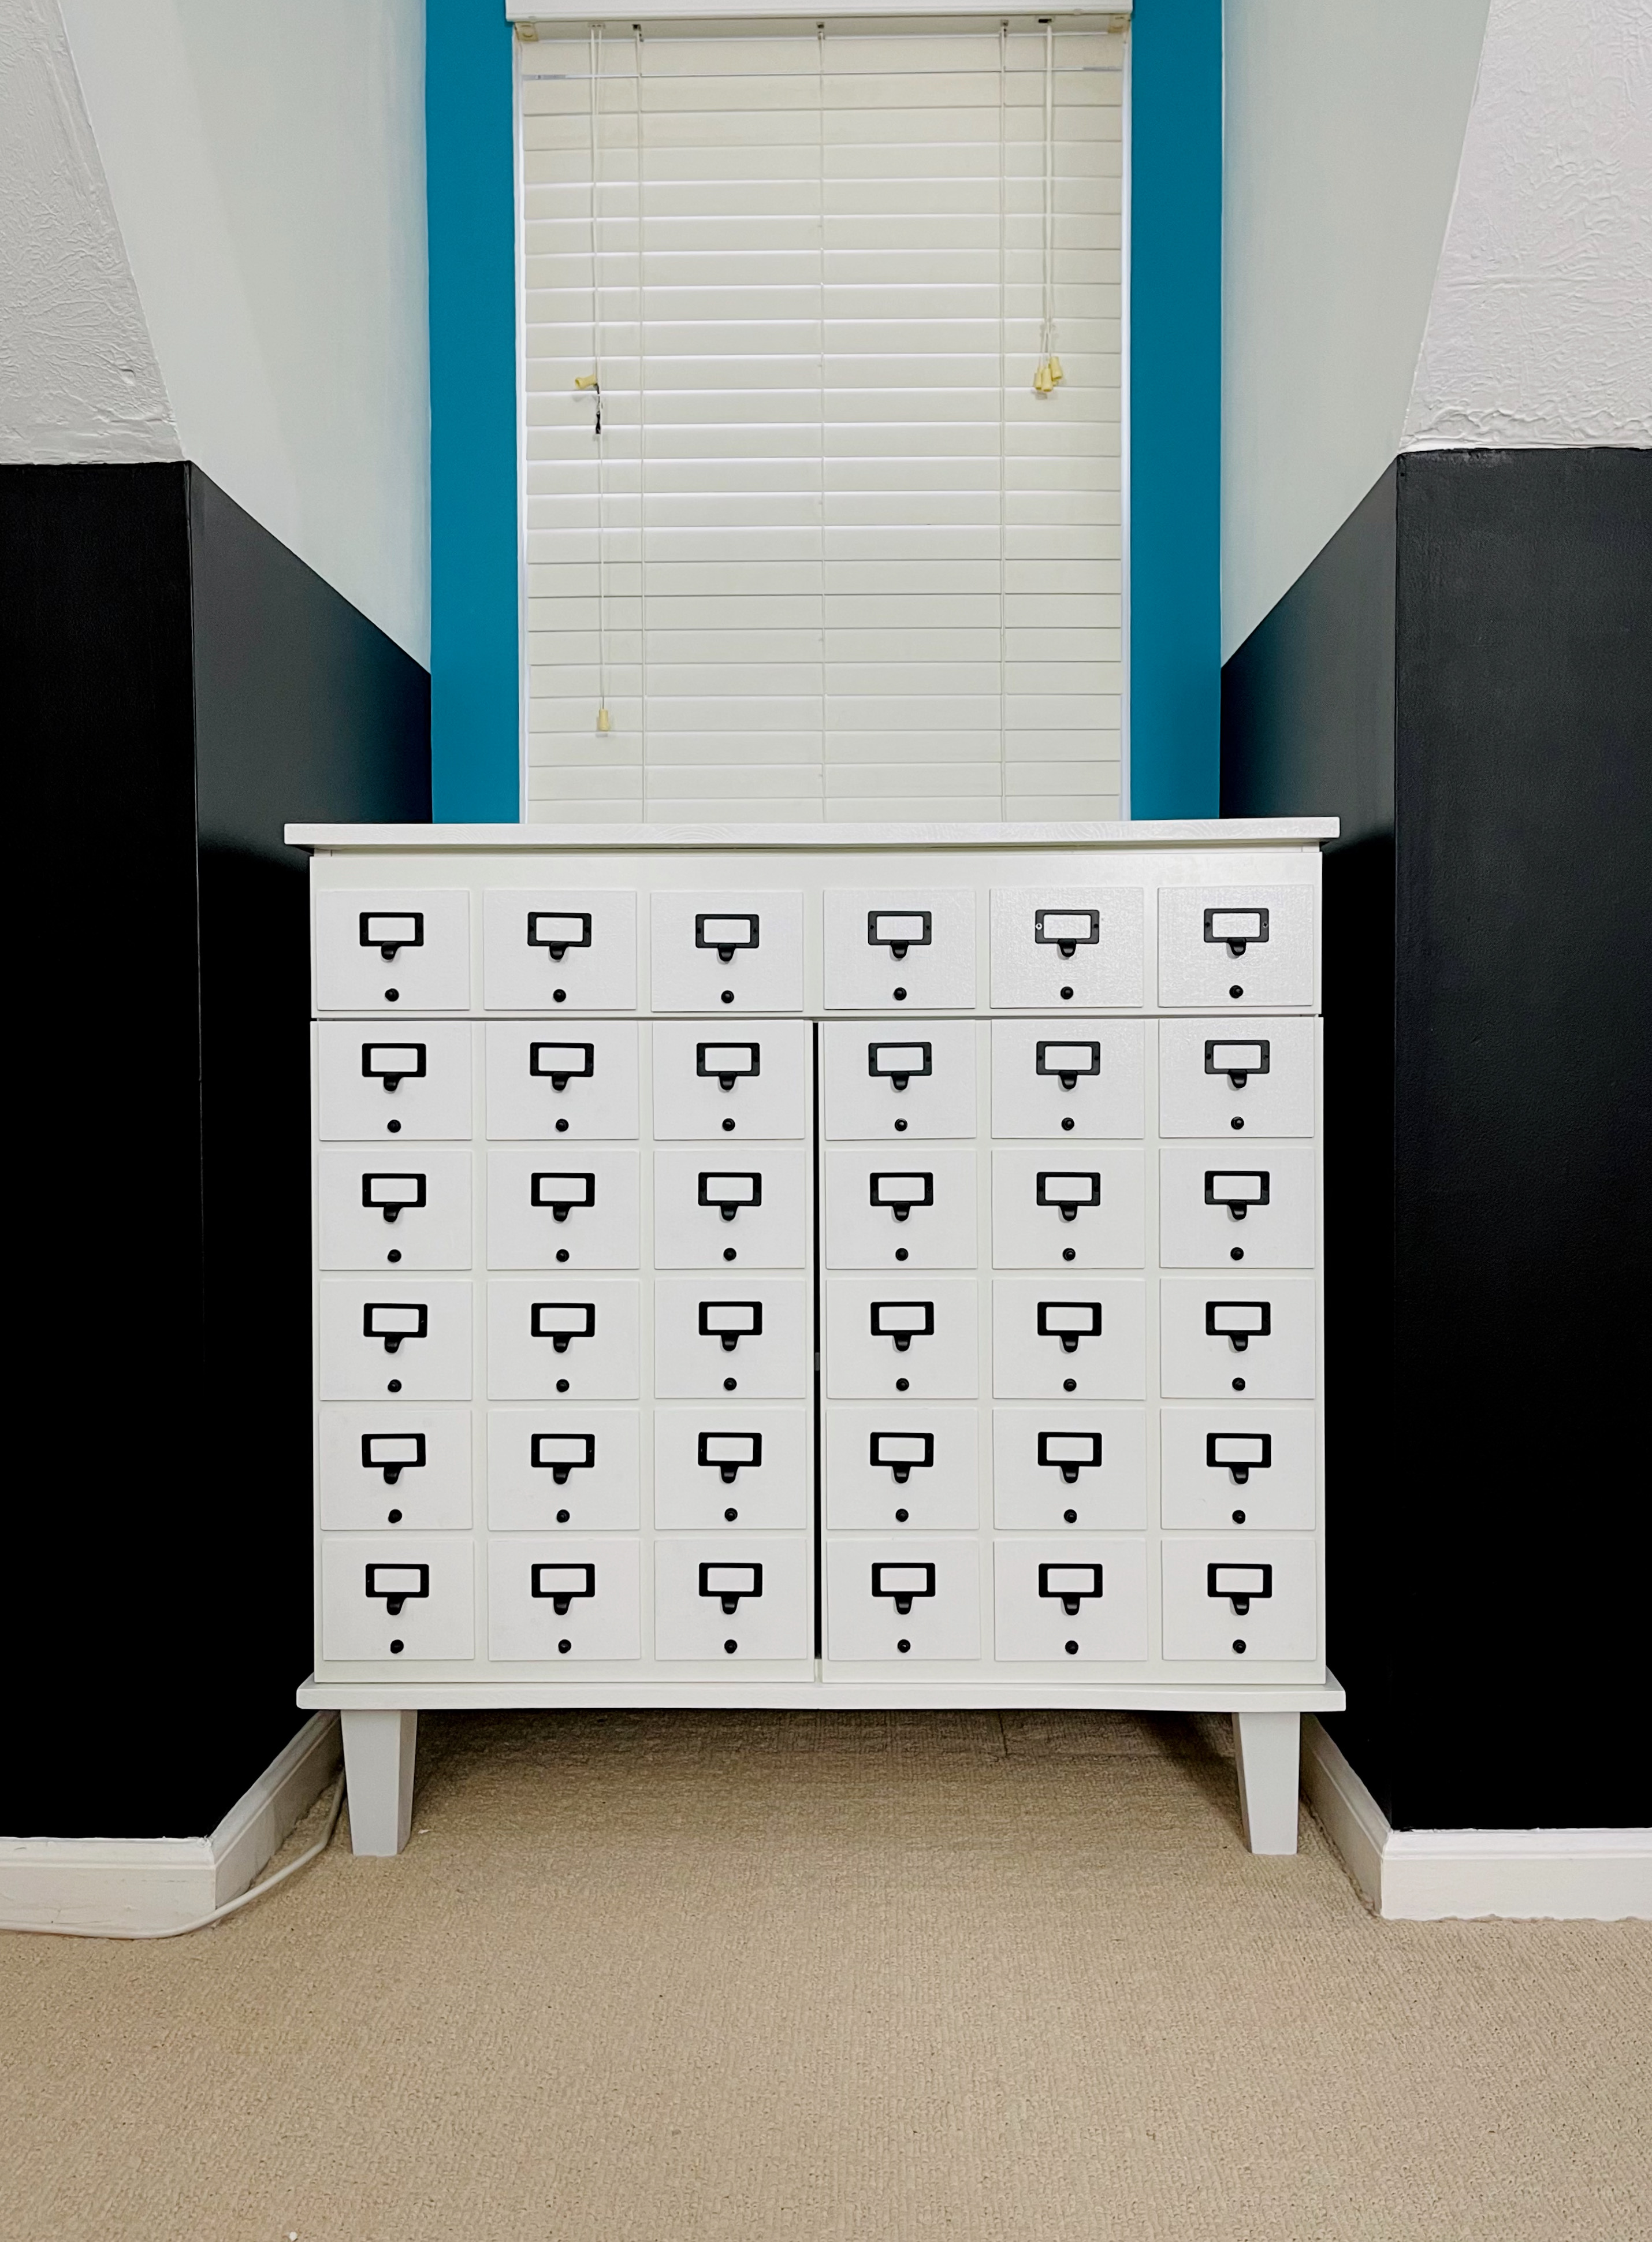
Dream, meet realized. For as long as I’ve been decorating my living spaces, I have wanted a card catalog. That desire got stronger when I created my writing-themed office a few years ago. However, the real card catalogs are quite expensive, and the storage in them honestly sucks for the amount of space they take up. For those reasons and more, I had to put my dream of a card catalog on the back burner. That’s where it stayed until I had a bit of a eureka moment a few weeks ago.
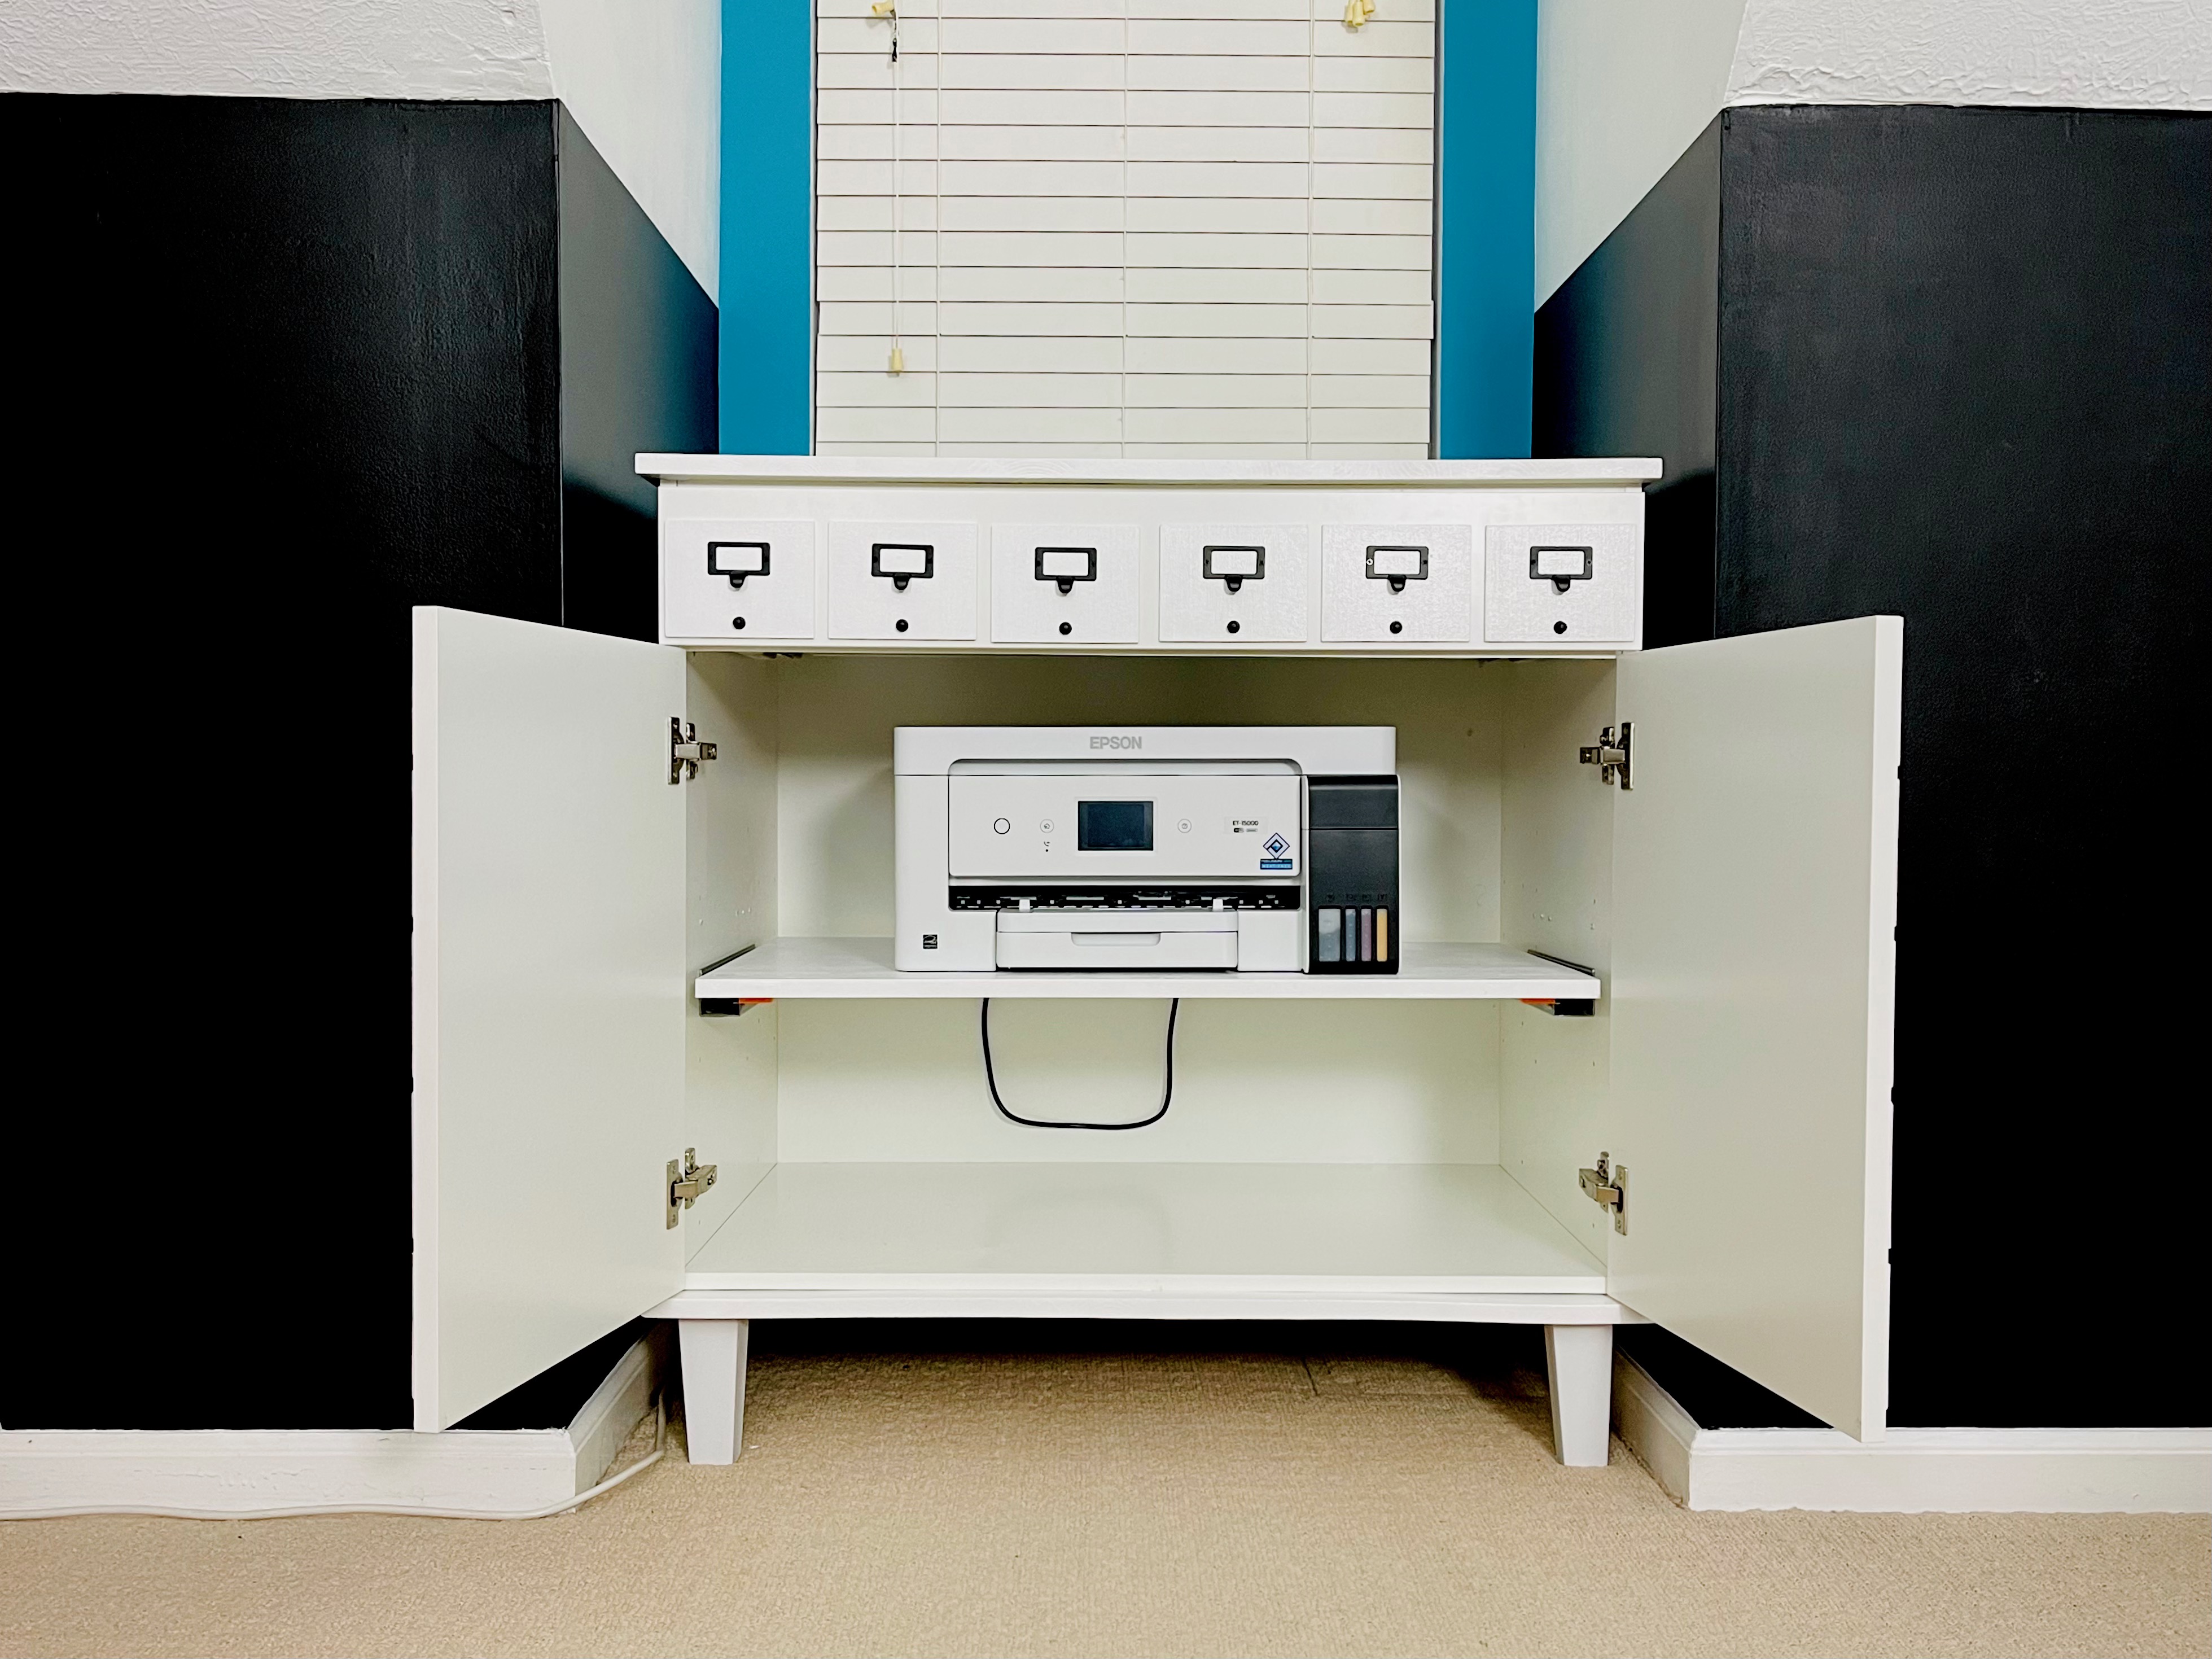
As we’ve gotten deeper into sublimation, our craft stash and printer collection has grown. It was barely a month after we built our awesome printer cart for our (then) two printers that we acquired a third printer…the Epson EcoTank 15000. We were STOKED to get that one but quickly realized that we had no where to put it. As we talked through new printer storage options we could build or buy, the idea came to me: a printer cabinet that was fronted with card catalog drawer faces.
We’d be remiss if we didn’t say this is one of those projects that seems easy at first but turns out to be one giant learning curve after another. However, now that we figured it out, we feel it’d be fairly easy to replicate for those who want to.
So check out the video below to see how we made a Faux Card Catalog Printer Cabinet:
We are a member of a few affiliate and/or influencer programs, which means that we earn a commission when you click on certain links or use our codes. You don’t pay anything extra for the items you buy; we just get credit for referring you!