I have wanted a world map end table FOR-EV-ER, but the problem has always been figuring out how to actually do it. Originally, we were planning cut the shapes out […]
I have wanted a world map end table FOR-EV-ER, but the problem has always been figuring out how to actually do it.
Originally, we were planning cut the shapes out of thin plywood, but the idea of free handing that with either a jigsaw or scroll saw was daunting. On top of that, we knew that making this out of even the thinnest wood would complicate the resin pour, we’d be pouring resin on an uneven surface and facing runoff as it leveled itself. Those two issues combined into this project staying on the back burner…until I got a Cricut Maker.
Once I figured out that I could have the Cricut cut the world map shape out of vinyl, I knew I was one step closer to turning my dream of a World Map End Table into a reality. However, even with the precision cutting of the Cricut, I knew it wouldn’t be easy.
The Cricut will only cut 11.5 wide, and the round is 17.75” in diameter. That meant that if we wanted the graphic to go edge to edge, it would have to be pieced together. Now, if we went with a typical world map, that wouldn’t be an issue, as we could just eyeball the placement of the continents. But of course I overcomplicated it and fell in love with a graphic that had connecting flight paths across it. Oops. 😬
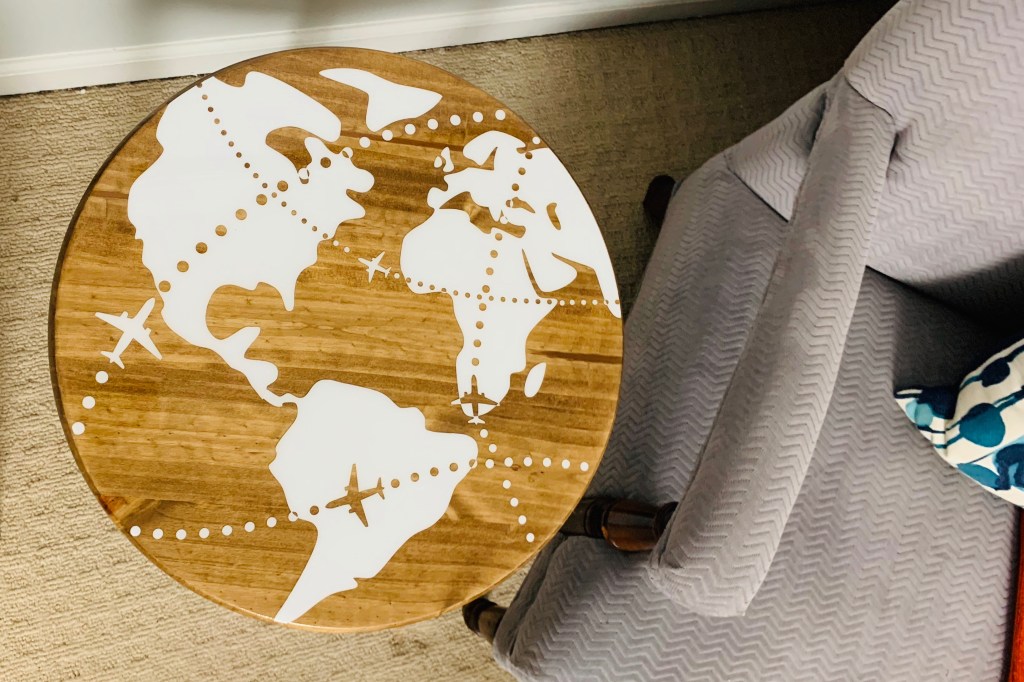
A lot of trail and error, including trying iron-on vinyl on the wood first (fail), we finally have the ultimate travel themed table.
In the video below, we show you how we made this beautiful end table, including how to stain and seal the wood round before applying the vinyl. We also give you a quick look at what we did in Cricut Design Space, as well as the full vinyl application process on the wood before pouring the resin.
A lot of trail and error, including trying iron-on vinyl on the wood first (fail), we finally have a larger-than-mat Cricut vinyl graphic, giving us the ultimate travel themed table. In the video below, we show you how we made this beautiful end table, including how to stain and seal the wood round before applying the vinyl. We also give you a quick look at what we did in Cricut Design Space, as well as the full Cricut vinyl application process on the wood round before pouring the resin.
And in the interest of full transparency, we also talk you through the three mistakes we made in our first attempt, which resulted in lumpy vinyl and uneven resin. Definitely stick around to the end of the video so you don’t make the same mistakes when you’re working with Cricut vinyl on wood.
Watch the video to see how we made the World Map End Table
We know there are tons of learning styles out there. If you prefer to follow along with written instructions and step-by-step with pictures, then our Instructable is for you! Click the following link to get there:
We are a member of a few affiliate and/or influencer programs, which means that we earn a commission when you click on certain links or use our codes. You don’t pay anything extra for the items you buy; we just get credit for referring you!