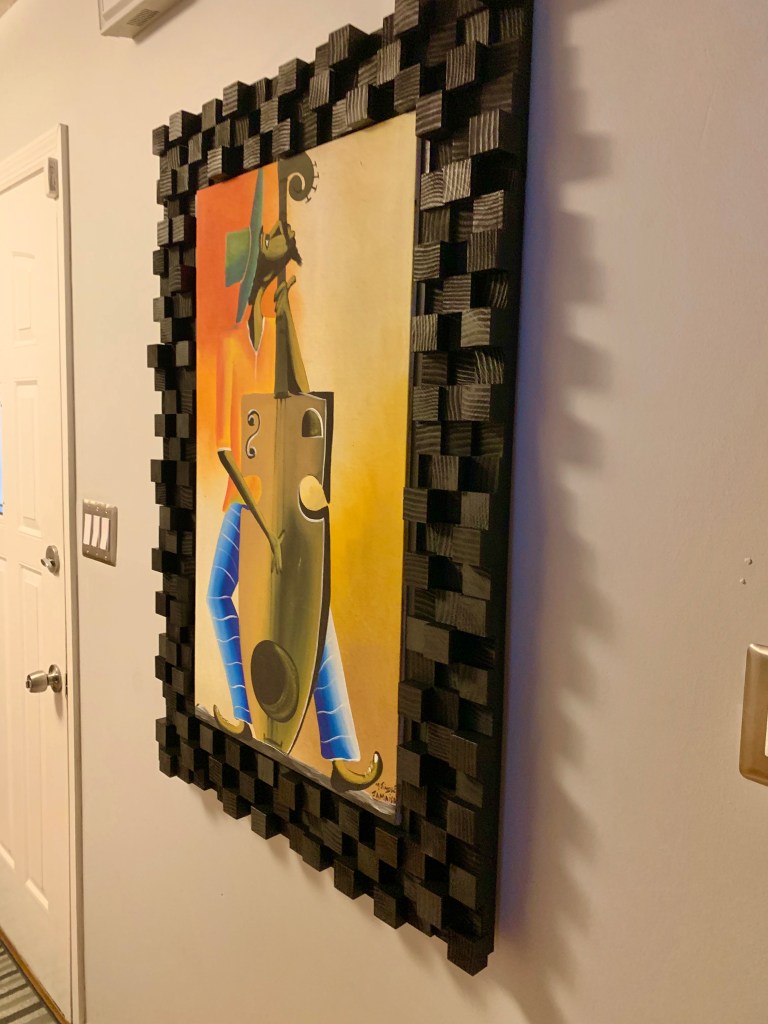
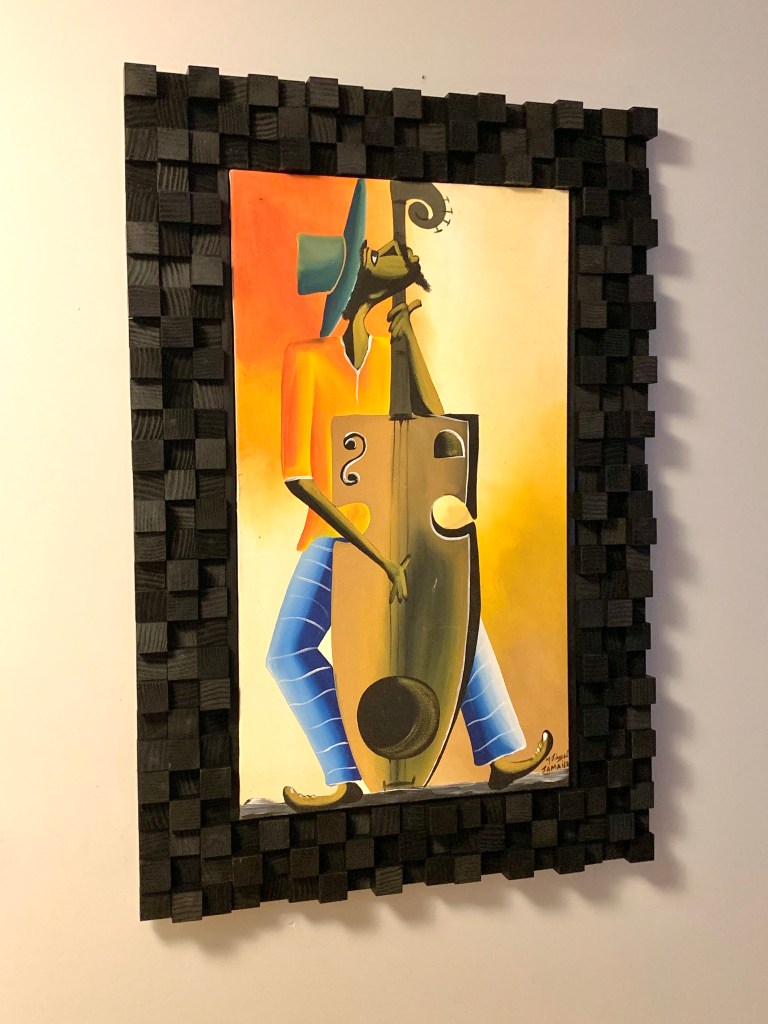
Y’ALL! We finally finished the biggest project we’ve tackled together. And we are smitten. We proudly present the Soundboard Frame for the canvas painting we picked this summer in Jamaica: […]
Y’ALL! We finally finished the biggest project we’ve tackled together. And we are smitten. We proudly present the Soundboard Frame for the canvas painting we picked this summer in Jamaica:
This beautiful painting came home with us all rolled up. We stretched it, built this amazing frame and mounted it—all by ourselves. We’ll do a “how to” post in the near future, but we couldn’t wait that long to share this beauty with you. Read on to learn about the inspiration behind the frame and a few thoughts on how the build went.
JZ’s Inspiration:
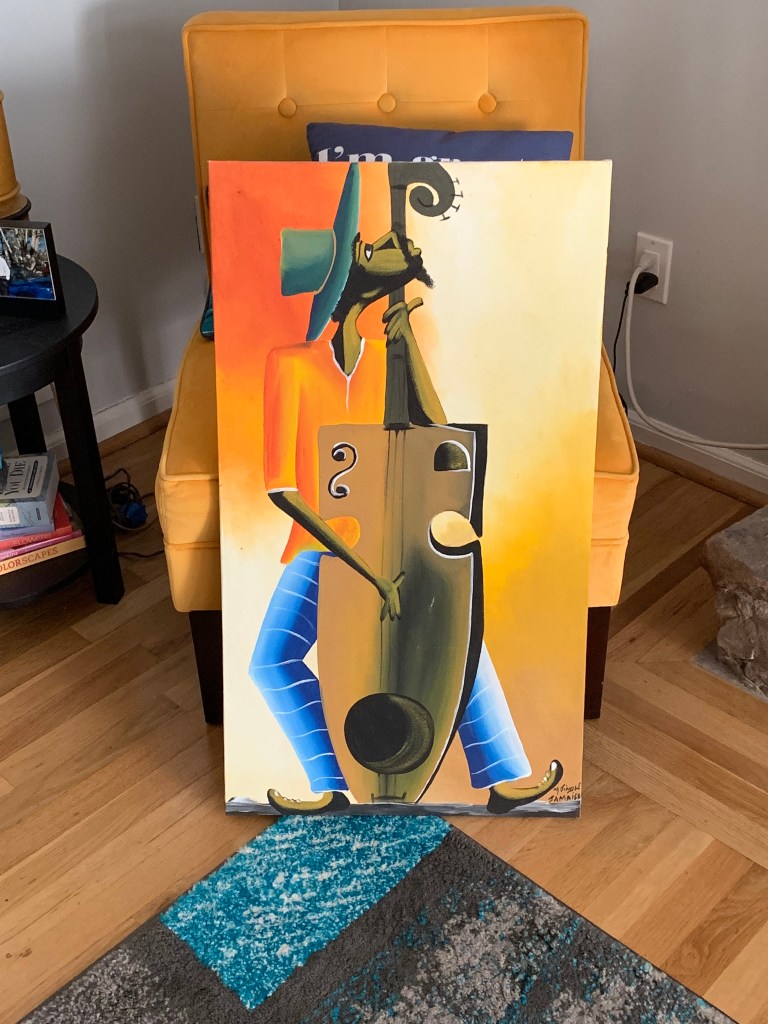
There are three things I always try to find as souvenirs when I travel: a piece of jewelry, some sand (if it’s a beach), and a piece of art to put somewhere in the house. When Daniel and I went to Jamaica in June, there was this amazing little row of tents on the beach near our resort, with locals selling all kinds of (mostly) handmade wares. I knew that I had a spot for a large painting, so we spent longer than we probably should have looking for the perfect piece.
I landed on this one because it’s bright colors and musical theme captured the essence of our Jamaican experience (and I knew the colors would coordinate perfectly with the nearby living room).
Painting rolled up and ready for the trip home!
The colors worked SO well with the nearby living room.
When we got back stateside, I began googling for creative ways to frame or hang a canvas. And to be honest, I didn’t find anything inspiring. That led to more searching for musical themed art, as the painting featured a musician) just to get some inspiration, and I found exactly that in some amazing wooden soundboards.
The Build Story
Almost immediately after landing on the inspiration, I started to sketch out the frame. I knew I’d need at least three rows to get the effect I wanted with the varying levels, and then came the math. Lots of math, which luckily D is incredibly good at. After the crunching the numbers, we found that we would need 244 perfectly square blocks…not a small number at all.
So how did it go? Let’s just say that it took WAY longer and a few too many restarts to get over the finish line on this one. We essentially had to go back to the saw to cut the wood blocks FOUR TIMES before we got it right.
Needless to say, I’m thankful we have a compound miter saw, which at least made all the extra cutting go faster. We also changed the stain we used, as well as our staining method after the first round bombed.
Ultimately, we learned a ton about variations in wood, staining techniques and more throughout the couple months’ long journey. But it was totally worth it.
We are a member of a few affiliate and/or influencer programs, which means that we earn a commission when you click on certain links or use our codes. You don’t pay anything extra for the items you buy; we just get credit for referring you!


That’s very creative! I love the 3d texture of the frame and the color contrasted to the fabulous art!
LikeLike
Thanks! It was a labor of love for sure. SO glad you like it!! We’re working on a how-to video that we hope to post soon. 🙂
LikeLiked by 1 person
That would be a great share!
LikeLiked by 1 person
I have never seen a frame like this, I like it, it really works with the painting.
LikeLiked by 1 person
Thank you! We had so much fun creating something unique. Really glad you like it. 🙂
LikeLike